Why are anchors faster than using bindings?
In the QtQuick performance considerations documentation, Qt developers suggest that we should be using anchors rather than bindings to position items in a scene.
It is more efficient to use anchors rather than bindings to position items relative to each other. Consider this use of bindings to position rect2 relative to rect1
- https://doc.qt.io/qt-5/qtquick-performance.html#position-elements-with-anchors
But why is that? Like with all performance related topics, the first thing we need to do is to actually prove the claim that bindings are indeed slower.
Let’s create a rudimentary example. We have three rectangles. We want them to be displayed one after another in a row so we see something like this:

The position of the green and blue rectangles depend on the position and the size of the red
rectangle. Now, in our test we’ll create 10000 of these and try to change the x property of the
red rectangle and see how much time it takes to update the position of all 10000 x 3 rectangles.
Window {
    Row {
        width: parent.width
        spacing: 50

        Column {
            width: 150
            spacing: 2

            Button {
                text: "Inc Binding X"
                onClicked: {
                    console.time("redPosX")
                    root.redPosX += 10
                    console.timeEnd("redPosX")
                }
            }

            Repeater {
                model: 10000
                delegate: cmpPos
            }
        }

        Column {
            width: 150
            spacing: 2

            Button {
                text: "Inc Anchors X"
                onClicked: {
                    console.time("redAnchorX")
                    root.redAnchorX += 10
                    console.timeEnd("redAnchorX")
                }
            }

            Repeater {
                model: 10000
                delegate: cmpAnc
            }
        }

        Column {
            width: 150
            spacing: 2

            Button {
                text: "Inc Manual X"
                onClicked: {
                    const children = clManual.children
                    const size = children.length - 1
                    console.time("manualX")
                    for (let i = 0; i < size; i++) {
                        const item = children[i]
                        item.red.x += 10
                        item.green.x += 10
                        item.blue.x += 10
                    }
                    console.timeEnd("manualX")
                }
            }

            Column {
                id: clManual
                width: 150
                spacing: 2

                Repeater {
                    model: 10000
                    delegate: cmpManual
                }
            }
        }
    }

    Component {
        id: cmpPos

        Item {
            width: 100
            height: 50

            Rectangle {
                id: blue
                x: green.x + green.width
                width: 50
                height: 50
                color: "blue"
            }

            Rectangle {
                id: green
                x: red.x + red.width
                width: 50
                height: 50
                color: "green"
            }

            Rectangle {
                id: red
                x: root.redPosX
                width: root.redPosWidth
                height: 50
                color: "red"
            }
        }
    }

    Component {
        id: cmpAnc

        Item {
            width: 100
            height: 50

            Rectangle {
                id: blue
                width: 50
                height: 50
                anchors.left: green.right
                color: "blue"
            }

            Rectangle {
                id: green
                width: 50
                height: 50
                anchors.left: red.right
                color: "green"
            }

            Rectangle {
                id: red
                x: root.redAnchorX
                width: root.redAnchorWidth
                height: 50
                color: "red"
            }
        }
    }

    Component {
        id: cmpManual

        Item {
            readonly property alias red: red
            readonly property alias green: green
            readonly property alias blue: blue

            width: 100
            height: 50

            Rectangle {
                id: blue
                x: 100
                width: 50
                height: 50
                color: "blue"
            }

            Rectangle {
                id: green
                x: 50
                width: 50
                height: 50
                color: "green"
            }

            Rectangle {
                id: red
                x: 0
                width: 50
                height: 50
                color: "red"
            }
        }
    }
}
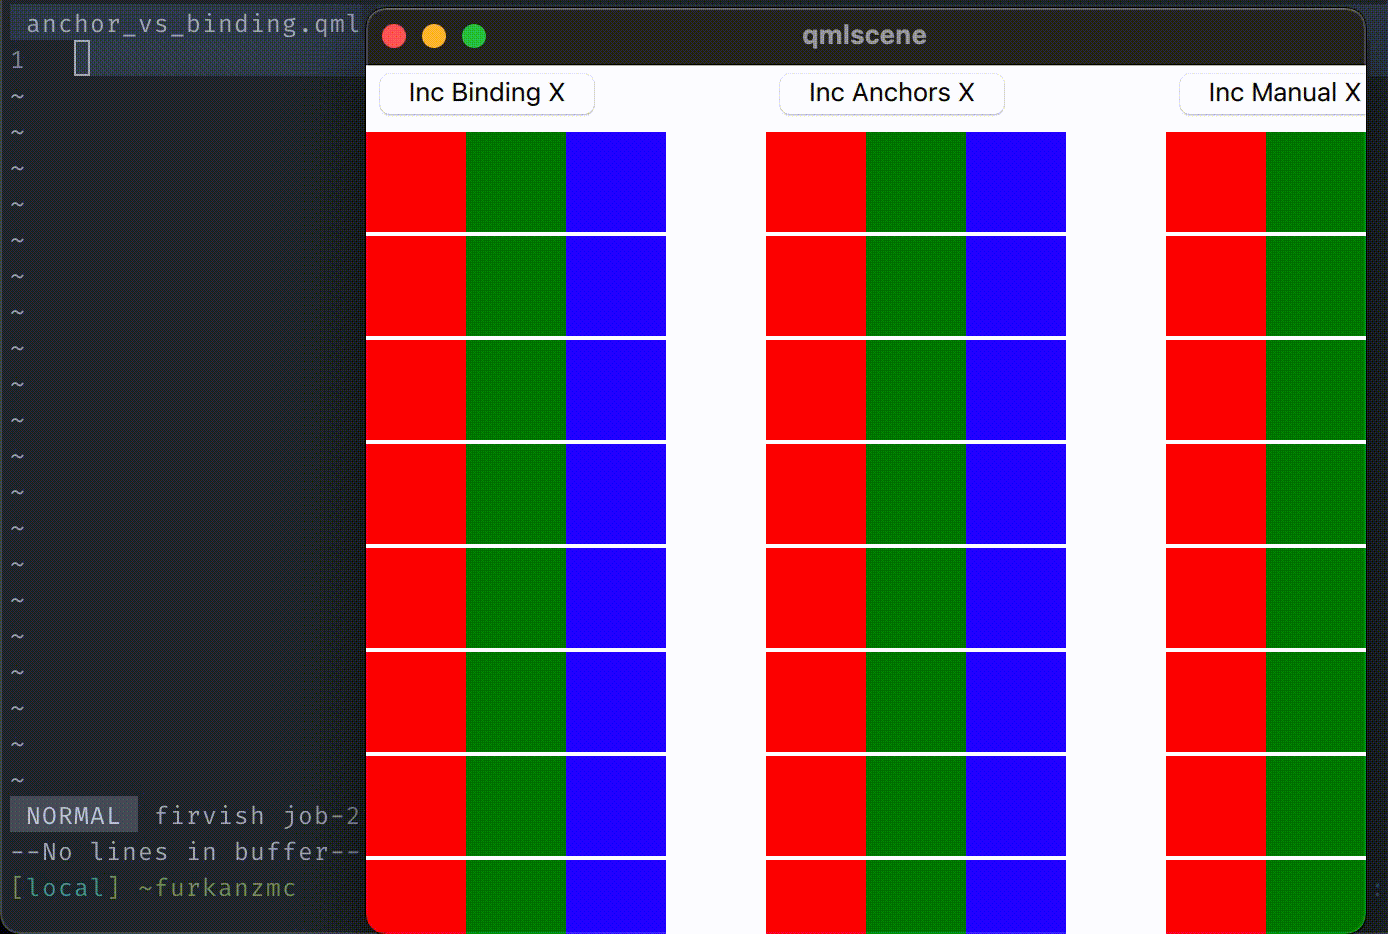
As you can see in the gif above, the x property of the red rectangle changes and it sets off a
chain reaction that results in the positions of the green and blue rectangles changing. The gif
demonstrates three different ways of doing the same thing.
The interesting thing that you will see in the screen cast is that the duration it takes for the
anchor positioning to finish is very close to the duration it takes for the for loop to run
through all the items and manually change the x properties.
There’s clearly something different in these approaches, and Qt’s claim that bindings are slow to reposition items holds up. Let’s go through the steps that the QML engine takes to change the position of these rectangles with each approach.
Binding Approach
Whenever we create a binding to a property, QML creates a QQmlBinding object which keeps track of
all the dependencies of a property.
Rectangle {
    id: blue
    x: green.x + green.width
    width: 50
    height: 50
    color: "blue"
}
In our example binding, we have 2 dependencies:
- Green rectangle’s
xproperty. - Green rectangle’s
widthproperty.
Whenever any of these dependencies change, the QML binding expression will be re-evaluated and the
resulting value will be set to the x property of the blue rectangle. So this process ends up
happening in these high level steps:
xChangedsignal is handled.- Binding is re-evaluated.
A binding is a JavaScript evaluation, so this happens in the context of a JavaScript engine. So there’s a overhead of this, however minor it is.
- Assign the resulting value of the binding to the property.
Each of these steps obviously take time, and given large enough numbers of rectangles like in our case or low enough hardware environment, this makes a significant difference.
Anchors Approach
Anchor objects are initialized as part of a QQuickItem. By default, a QQuickItem won’t have
anchors. Rather, they are created on demand when the anchors is declared in the QML document.
// qt5/qtdeclarative/src/quick/items/qquickitem.cpp
QQuickAnchors *QQuickItemPrivate::anchors() const
{
    if (!_anchors) {
        Q_Q(const QQuickItem);
        _anchors = new QQuickAnchors(const_cast<QQuickItem *>(q));
        if (!componentComplete)
            _anchors->classBegin();
    }
    return _anchors;
}
So, we pay an initial price for using anchors but it’s going to be negligible in most cases. But, as we’ve seen it actually gives us a boost when doing positioning in large amounts. What is happening when we create a binding and why are they faster? Let’s go through some of the high level details of anchors.
Rectangle {
    id: blue
    width: 50
    height: 50
    anchors.left: green.right
    color: "blue"
}
When the anchor is created and assigned an anchor line, the right hand side anchor line is added as
dependency to the item’s anchors. In our example, blue’s left anchor line depends on green’s right
anchor line. When the dependency is added, QQuickAnchors adds an item change listener to green.
// qtdeclarative/src/quick/items/qquickanchors.cpp
void QQuickAnchorsPrivate::addDepend(QQuickItem *item)
{
    if (!item || !componentComplete)
        return;

    QQuickItemPrivate *p = QQuickItemPrivate::get(item);
    p->updateOrAddGeometryChangeListener(this, calculateDependency(item));
}
Whenever green’s geometry changes, QQuickAnchorsPrivate::itemGeometryChanged() is called and the
anchors object recalculates the positions and sets it to the item.
Here’s the high level steps:
- We change the
xproperty of the red rectangle. itemGeometryChangedis called.- Positions are re-calculated and set to the item.
These steps avoid JavaScript execution context, it all happens in the C++ side, and doesn’t include any signal handling. There’s always a cost when we breach C++/QML boundaries and this approach avoids breaching that boundary the most.
Direct Assignment Approach
Although at first look it may seem odd that this approach is almost as fast as the anchor approach, it actually makes sense. With this one, we are bypassing many of the underlying function calls that the other two approaches are doing. Even though there’s 3 level steps highlighted in both approaches, there’s a lot more going on behind the scenes. But this approach avoids all that by directly changing the value.
With this, all the involved steps just boils down to:
- Set the
xproperty.
And that’s it. The machinery that enables the change to take effect and show on the window is identical in all approaches.
Button {
    text: "Inc Manual X"
    onClicked: {
        const children = clManual.children
        const size = children.length - 1
        console.time("manualX")
        for (let i = 0; i < size; i++) {
            const item = children[i]
            item.red.x += 10
            item.green.x += 10
            item.blue.x += 10
        }
        console.timeEnd("manualX")
    }
}
Since we are actually running this as JavaScript, it’s still a bit slower compared to if we wrote this in C++.
I’m hoping to create more posts that are similar to this one to explain some of the inner workings of Qt and QML to both strengthen my understanding of it and also help others get a better insight into how things work.
There’s a lot more going on than what I described in this post, but each of those approaches deserve a dedicated post. I plan to make in-depth studies of some fundamental Qt classes that enables us to do what we do.
Resources
When writing this code, I used the following files as references and you can also take a look yourself to get a better look:
Here’s the link to the documentation for performance considerations.